
Upgrading a laptop often feels like the only solution when you need more power, but that’s not always true. Instead of buying an expensive gaming laptop or bulky desktop, I discovered a smarter option: building my own eGPU (external GPU). With the right dock, a spare graphics card, and a suitable power supply, I was able to give my Lenovo X1 Carbon near-desktop-level performance—without compromising portability or battery life.
Best of all, the process was much easier and more affordable than I expected, making it one of the most practical DIY upgrades I’ve ever completed.
Read More: 6 Simple Ways to Back Up Data Without an External Drive
Why I Built a DIY eGPU
Building my own eGPU (external GPU) was a practical choice. My Lenovo X1 Carbon handles writing, browsing, and productivity tasks flawlessly—but gaming or editing QHD video quickly exposed its limits.
Buying a gaming laptop felt unnecessary. They’re bulky, drain battery life, and cost far more than I wanted to spend. My X1 Carbon, on the other hand, is slim, quiet, and lasts all day, perfect for portability.
A DIY eGPU gave me the best of both worlds: near desktop-level graphics at home and lightweight mobility on the go. It also costs far less than a pre-built enclosure. The real game-changer, though, was convenience. Instead of juggling four or five cables at my desk, one Thunderbolt 4 connection now powers my monitor, charges my laptop, and manages all my peripherals.
Step-by-Step Guide to Building a DIY eGPU
Before building an eGPU, it’s essential to understand the basics. If flexibility and performance matter to you—as they do for me—creating your own eGPU is one of the most innovative and most cost-effective solutions.
What You Need to Build an eGPU

Building a DIY eGPU only requires a few key components:
- Graphics Card – I used an RTX 2070 that I already owned, but any desktop GPU will work, depending on your budget and performance needs.
- Power Supply Unit (PSU) – My setup utilizes a Seasonic Focus 500W ITX PSU, although most standard PSUs are compatible with modern eGPU docks.
- eGPU Dock – I chose the TH3P4 Thunderbolt GPU Dock with 85W power delivery. Unless your laptop has an OCulink port, a Thunderbolt dock is the easiest option.
- Thunderbolt Cable – Usually included with the dock. When buying separately, ensure it’s Thunderbolt-certified, not just USB-C.
- Thunderbolt Control Center – Free from the Microsoft Store for managing connections.
- GPU Drivers – Download the latest version from NVIDIA or AMD.
My complete setup costs about $430, which is far less than a commercial eGPU enclosure and a GPU. Most pre-built solutions start at $300 just for the enclosure, before adding a graphics card. If you already own a spare GPU and PSU, you’ll only need the dock (around $120), making it even more affordable. I chose the TH3P4 dock because it includes power delivery and supports daisy-chaining additional Thunderbolt devices.
How to Assemble and Configure a DIY eGPU
Setting up an eGPU is easier than it sounds. No complicated software or hidden tweaks are required—just assemble the hardware, install drivers, and you’re ready to go.
Prepare the Dock
Attach the mounting bracket to the eGPU dock. This holds both the graphics card and power supply unit (PSU) securely in place.

Install the PSU
Secure the PSU with the fan facing outward for proper airflow.

Insert the GPU
Slide your graphics card into the PCIe slot and fasten it to the bracket with a screw.
Connect the Power Cables
Attach the 24-pin cable to the dock, the 4+4-pin for charging, and the PCIe connectors (6+2 or 8-pin) to the GPU. Double-check all connections.

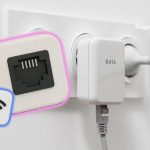
Connect to Your Laptop
Install Thunderbolt Control Center from the Microsoft Store, then use a certified Thunderbolt cable (not just a USB-C cable) to connect the dock to your laptop. In the app, set your eGPU to Always Connect for seamless use.

Install GPU Drivers
Download the latest drivers from NVIDIA or AMD. Once installed, you should see the GPU control panel in your system tray. Tools like GPU-Z can confirm everything is running correctly.
Optimize Your Setup
For optimal performance, connect your external monitor directly to the eGPU’s video outputs, allowing the desktop GPU to handle all graphics.

The whole process takes about 20–30 minutes, with most of the time spent on assembly. Once the drivers are installed, your laptop is instantly upgraded with desktop-level graphics power.
An eGPU Dock Is More Than Gaming.
My eGPU dock does far more than boost graphics—it’s completely reshaped how I work. With 85W power delivery, my laptop charges while in use, eliminating battery concerns during long gaming sessions or heavy workloads.
It also doubles as a universal docking station. Multiple USB ports let me connect my keyboard, mouse, and peripherals without needing a separate hub. Now, a single Thunderbolt cable handles charging, display, and accessories.

The dock works seamlessly with Thunderbolt-supported handhelds and mini PCs, making it easy to share. Friends can plug in their devices and enjoy desktop-level performance, while I use my own PC for co-op gaming.
Thanks to the Thunderbolt Control Center app, the setup feels truly plug-and-play. One cable provides me with instant access to a dedicated GPU, a larger monitor, and a complete desktop workflow. When I leave, I disconnect safely and take my laptop on the go.
Building this eGPU has been one of my most rewarding DIY projects. It delivers powerful graphics when needed, keeps my laptop portable, and saves me the cost of buying a new machine.
Frequently Asked Questions
What is an eGPU?
An eGPU (external GPU) is a desktop graphics card connected to a laptop or mini PC through a high-speed interface like Thunderbolt. It boosts graphics performance for gaming, video editing, and creative work.
Is it worth building a DIY eGPU instead of buying a gaming laptop?
Yes—if you already own a capable laptop. A DIY eGPU gives you desktop-level graphics without sacrificing portability or battery life, and it’s often cheaper than buying a new gaming laptop.
How much does it cost to build an eGPU?
A DIY eGPU setup typically costs between $120–$450, depending on whether you already own a graphics card and PSU. Pre-built enclosures alone often start at $300 before adding the GPU.
Do I need technical skills to set up an eGPU?
Not really. Assembly involves installing a graphics card, connecting a power supply, and plugging into a Thunderbolt dock. Most of the setup is plug-and-play, with minimal software configuration required.
Can all laptops use an eGPU?
No. Your laptop must have a Thunderbolt 3 or 4 port (or OCulink on some models) to support eGPU connections. Standard USB-C ports won’t work.
Does an eGPU work for more than gaming?
Absolutely. An eGPU accelerates video editing, 3D rendering, CAD, and other Computationally Intensive tasks that require a powerful GPU. Many docks also serve as full docking stations, complete with charging, monitor support, and additional ports.
Should I connect my monitor directly to the eGPU?
Yes. For optimal performance, connect your external monitor to the eGPU’s video outputs, allowing all rendering to be handled by the desktop GPU instead of your laptop’s integrated graphics.
Conclusion
Building my own eGPU turned out to be far easier—and more rewarding—than I expected. Instead of replacing a perfect laptop, I now enjoy desktop-class graphics performance at my desk while keeping the portability and battery life I value on the go. The setup is cost-effective, simple to build, and flexible enough to handle gaming, creative projects, and everyday work.
If you’re looking for a way to extend the life of your laptop without overspending on a new machine, a DIY eGPU is one of the smartest upgrades you can make.